If there’s one thing I love about learning history, it’s the timelines. You can see exactly what happened and when. It helps me so much to visualize specific events and be able to place them in order.
We’ve tried several history timelines in our homeschool. Mystery of History, My Father’s World and a few from Teacher’s Pay Teachers. While I do appreciate the effort that went into creating these helpful curriculum, they never made me get excited about learning history. It seemed like all you do is read and do silly little activities. I wanted something totally different for our homeschool. What I really wanted was a hands-on history timeline that required MY KIDS to do the dirty work.
I recieved The Giant American History Timeline for free and was compensated for my time. A positive review was not required and all opinions are my own.
The Giant American History Timeline was exactly what I was looking for! Instead of me reading to the kids, they had to dig in and learn on their own. Not only is this perfect for teaching history, but also helps perfect their research skills. It was like this curriculum was built for unschoolers, giving just enough information to spark interest and make them want to learn more.
What You Need to Know About The Giant American History Timeline
Perfect for Any Age:
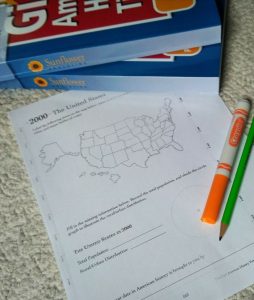
All of my kids love The Giant American History Timeline. My high schooler enjoys the quick and to the point lessons that encourage her to learn about events on her own. My middle schooler loves that each lesson is different. While one lesson may require her to color specific territories, another will prompt her to research historical figures or write a postcard to your friends describing what you’ve learned about Native Americans. My kindergartener enjoys picking out books at the library to read along with each lesson. (This isn’t necessary, but I’ve found it’s the perfect way for our little guy to get involved without a lot of writing.)
Affordable:
Y’all know I don’t like to spend money on very many things but I do splurge when I find a curriculum that literally excites me. Lucky for me, The Giant American History Timeline doesn’t even make me choose between a curriculum I love or sticking to my budget. At only $30 per book, it’s as affordable as you can expect out of ANY homeschool curriculum. While each page can be torn from the books, we opted to photocopy each page, so we can reuse the books again in a few years. (The joys of having your kids 5 years apart.) 😉
Start Where You Want:
We allllllways start at the beginning of time. No matter what curriuclum it is, it seems like we only get as far as learning about Early Egyptians before we lose interest and toss the books to the side. That’s why we decided to start at the END of The Giant American History Timeline and work backwards. We started with the events that my kids are most familiar with. There’s no right or wrong way to learn about history and this is a fun change of pace.
Family-Style Learning:
One of my very favorite things about The Giant American History Timeline is that we’ve approached it a little bit differently than any other curriculum we’ve used. Instead of sitting down and reading through the text (while the kids zone off into lala-land) and then me rehashing the details when we’ve finished, I’ve found a way to include them all without boring them to death.
Each week, I give each of the kiddos one lesson to complete themselves. The rules are simple: do your best and have it done by Friday. Friday afternoons, we gather in the living room and begin with the first lesson. Armed with their lesson’s timeline assignment, they tell us what they learned about that week. They can do the research any way they want to but they must be prepared to answer questions the other kids have about their event. Some weeks they read books or watch movies, other weeks they learn all about their timeline project from the internet. However they choose to learn is up to them. After they’ve told us about their event or person, we move on to the next person. Once everyone has presented their project, we add their papers to the timeline.
The kids always look forward to doing this each week and I am simply impressed with how much their presentation skills have improved with just this one simple task.
Put Those Books to Use:
If you’re a homeschooler, you have books. It’s that simple. If you don’t have a stack of books sitting on a surface of your home, I really question if you are a true homeschooler. (Totally kidding!) One thing we hate about books is that they sometimes get pushed to the back of the shelves and forgotten. Since we started using The Giant American History Timeline, we’ve read more books than we have in a long time! The kids enjoy looking through our books to see what they can learn using books we have instead of taking a trip to the library. And I love the gratification I get when my husband tells me to downsize our library and I can honestly say “Nope, we use them all!”
Use it as a Unit Study:
A few weeks ago, we watch the American Girl Movie: Molly which was set during WWII. My 5th grader wanted to learn more about the days of war, so we skipped to Lesson 6 of Book 2. I didn’t need to put together a unit study. All the hard work is done for you! The Giant American History Timeline is organized in a way to that allows us to skip around and focus on whatever interests us at the time!
How to Display Your Hands-On History Timeline
Many homeschool families struggle with space and, boy, do I understand. Wall space is about as scarce as free time around our house! But just because you lack wall space doesn’t mean you can’t enjoy a timeline. You just might have to get creative!
Wall:
The most ovbious way to display your timeline is to hang it on the wall. In fact, it comes complete with arrows and dates that allow you to do this easily. For us, we hang the timeline in our office until it’s complete. Then we move it to our long, narrow hallway. (I’m surely not the only person who lives in a ranch style house that provides a dark hallway leading to the bedrooms. Put that space to use!) In fact, I don’t have a lot of extra space, so I actually cut out each page to make them smaller. I also make the arrows and dates smaller, so I can fit them into our area. Then I liven them up with some bright colors.
Another idea is to simply go around the TOP of your walls with your timeline. The pages provided by The Giant American Timeline are big enough for you to see from a few feet below but you can squeeze them into your space, without having to make a lot of extra room.
PosterBoard:
Using a trifold posterboard makes it easy to hide your timeline when it’s not in use. Some of the units are a bit longer, so we just use regular ol’ posterboard for those. For $1, I can purchase 3 colorful posterboards at my local Dollar General. When you’re not using the timelines, you can just slide them behind your bedroom door until you need to pull them out again.
Table:
One of my very favorite way to display our learning materials is to use a clear tablecloth. This keeps our topics right in front of us and makes it super easy to tell Daddy what we’ve worked on that day. We can discuss history during dinner or easily show the grandparents what we’ve been learning when they stop by for a visit. A clear tablecloth is one of our best investments as a homeschool family and one I would recommend to everyone! For around $20, you can showcase your latest work or your favorite peices of art.
Folders:
Another simple way to keep track of your timelines is to store them each in a simple folder. Then when you want to look at it, you can simply pull out the folder and all of the timeline components and put it together. You can do it on the floor or your coffee table or anywhere else you have extra room. This is a nice way to keep The Giant American History Timeline organized when you’re not using it but may want to pull it out and look at it from time to time.
What’s Covered in The Giant American History Timeline:
Book 1: Pre-Colonization- Reconstruction
- Discovery & Exloration
- Colonial America
- The Revolutionary Period

- Creating the Constitution
- Expanding the Country
- An Age of Advancements
- Social Issues
- The Civil War & Reconstruction
Book 2: 1870’s- Present
- Industrial Growth & Technological Advancement
- Big Business & Social Reform
- America and the World
- World War I
- The Roaring Twenties and the Great Depression
- World War II
- The Cold War
- The Civil Rights Movement, Technology & Terrorism
If you’re looking for a fresh approach and an exciting and hands-on history timeline, check out The Giant American History Timeline! You won’t be disappointed.
<
Grab your copy of The Giant American History Timeline and more amazing products from Sunflower Education!